Create a new workflow
To create a new workflow:
- Click the New button
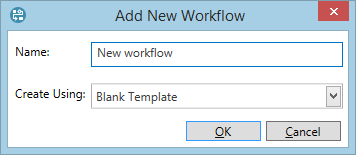
 in the Workflows tab on the ribbon. In the Add New Workflow dialog, enter the name of the new workflow.
Dataflow comes with a set of workflow templates; if you want to use a template, select it in the Create Using field. For more information
about these templates, see Workflow templates.
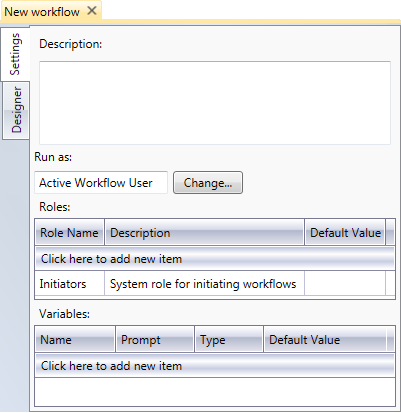
 - Click OK and the new workflow will appear on the list of workflows and will be automatically opened for editing. The Settings tab is used to specify various parameters of the workflow, and the Designer tab is used to create steps within the workflow.
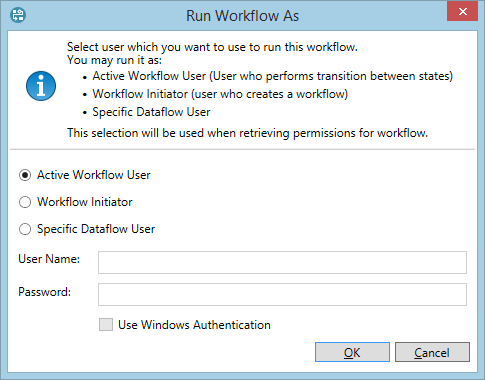
- The Run as field is used to specify the type of security that the workflow will use, with the option to restrict access to a particular user account. The options are described in the table below.
- The Roles table is used to create roles for users who will be involved in the workflow; these roles are separate from application roles and only work within a given workflow. By default, it contains the Initiators role; initiators are users who can start workflows. Depending on the workflow, you can add other roles (for example, Approvers or Reviewers). Click the Default Value cell to select the users or workgroups which will have this role by default; you can change this later when you associate the workflow with document templates.
- In the Variables table, you can create variables for use within the workflow; these variables are separate from application variables. For example, if you want the workflow to assign a tag to a revision but do not want to specify the tag at this stage, you can create a variable named Revision Tag and use it instead. You can select the actual values for variables later when you associate the workflow with document templates.
- Open the Designer tab and design the workflow. You can find information about designing with generic workflow activities at https://docs.microsoft.com/en-us/visualstudio/workflow-designer/using-the-activity-designers. For workflow activities that are specific to Planning Space, see Planning Space-specific workflow activities.
- Once the workflow has been designed, you can associate it with document templates. See Associate workflows with document templates.


| Option | Description |
|---|---|
| Active Workflow User | The workflow will use the account of the user that performed the last state transition. |
| Workflow Initiator | The workflow will use the account of the user that starts the workflow. |
| Specific Dataflow User | The workflow will use a specific Planning Space tenant user account. |
